Categories
Bukkit/Spigot stuff Computer/server projects

Speed up the Minecraft plugin development cycle

I developed a tool to help speed up the Bukkit/Spigot plugin development cycle. It’s quick and easy to use, doesn’t require much set up and here’s how to use it!

WatchdogReloader

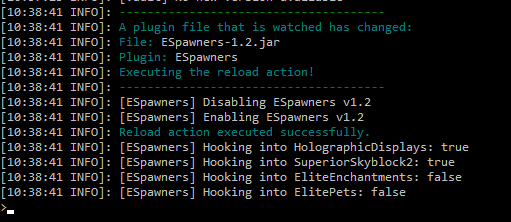
WatchdogReloader is a simple utility plugin I made, which reloads a plugin when the .jar file gets changed inside the plugins folder. It monitors the folder using a watchdog service.
You can download the plugin here: https://github.com/WouterGritter/WatchdogReloader#download

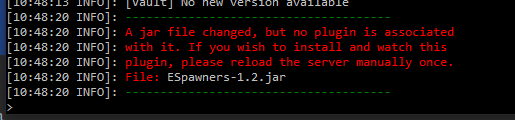
You just have to install the plugin, make sure the plugin you want to watch is loaded (by typing /reload once) and typing the command /watch <plugin>. It will tell you how to do this in chat as well!

A message generated by WatchdogReloader after a new plugin has been dropped in the plugins folder

FTP-reachable development server

Now that the plugin gets reloaded if the jar file gets changed, it’s time to speed up the process of getting the jar file in the plugins folder of your development server. Whether you host your development server locally or externally, this will work! You just have to make sure that the server files are reachable through FTP. If you host your server externally this is easy enough to do and you probably already have this set up.

If you are hosting your development server locally on Windows, I recommend downloading this program: https://www.sentex.ca/~mwandel/ftpdmin/
It’s old but gold. To use it for our purposes, put the .exe file in the server folder and write a batch file containing the following:

ftpdmin.exe -ha 127.0.0.1 .

This will set the host address (-ha) to 127.0.0.1, so nobody can reach the server outside of our machine. The root folder of the FTP server will be where the .exe file is placed in (.).

The username and password is not checked when a connection is made. You can enter whatever you’d like.

Maven FTP artifact

Now that you’ve got an FTP server running, it’s time to tell maven to upload the assembled .jar file of your plugin to it. It’s actually fairly simple!

Put this inside your pom.xml file, you don’t have to change anything about it:

<build>
    <plugins>
        <plugin>
            <groupId>org.codehaus.mojo</groupId>
            <artifactId>wagon-maven-plugin</artifactId>
            <version>1.0</version>
            <executions>
                <execution>
                    <id>upload-assembly</id>
                    <phase>install</phase>
                    <goals>
                        <goal>upload-single</goal>
                    </goals>
                    <configuration>
                        <serverId>ftp-repository</serverId>
                        <fromFile>${project.build.directory}/${project.build.finalName}.jar</fromFile>
                        <url>${ftpUrl}</url>
                        <toFile>plugins/${project.build.finalName}.jar</toFile>
                    </configuration>
                </execution>
            </executions>
        </plugin>
    </plugins>
</build>

Once that’s done, you need to put this in your global settings.xml file:

    <servers>
        <server>
            <id>ftp-repository</id>
            <username>FTP_USERNAME</username>
            <password>FTP_PASSWORD</password>
        </server>
    </servers>

    <profiles>
        <profile>
            <id>FTP upload</id>
            <activation>
                <activeByDefault>true</activeByDefault>
            </activation>
            <properties>
                <ftpUrl>ftp://FTP_SERVER/</ftpUrl>
            </properties>
        </profile>
    </profiles>

You have to change the FTP_USERNAME, FTP_PASSWORD and FTP_SERVER values to suite your environment.
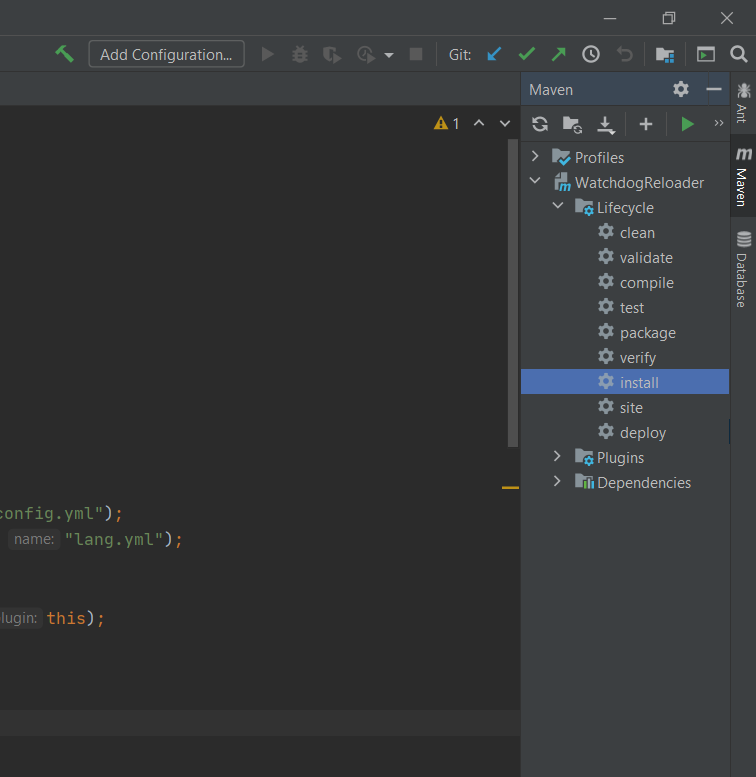
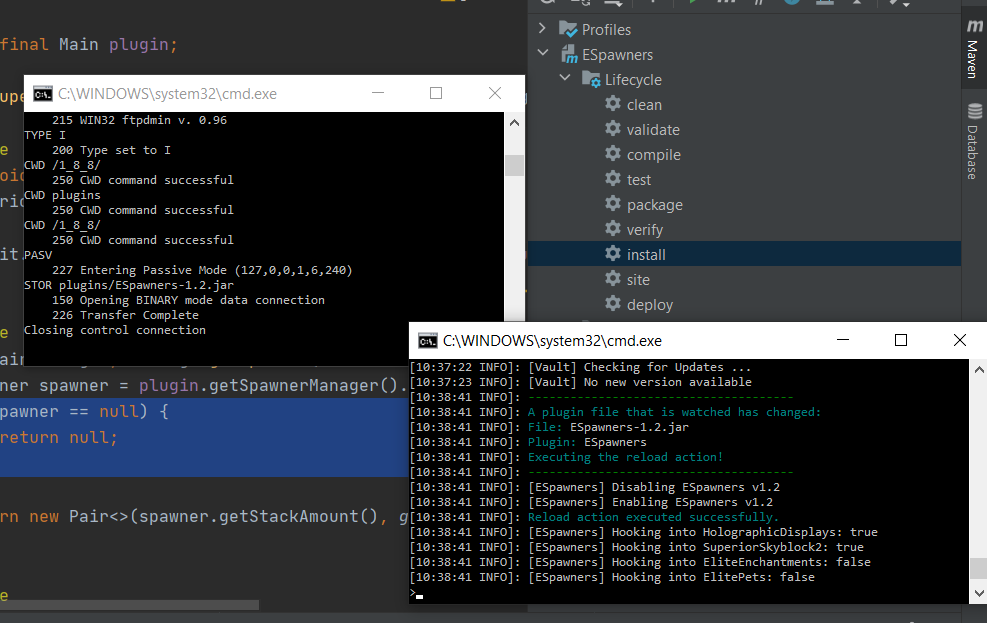
Testing your plugin

Now that you are done with the installation process, the process of compiling the plugin, uploading/moving the plugin and reloading the server is greatly reduced in time. It’s just a matter of double clicking the install button and everything will be done for you!

Maven install button in IntelliJ
Console output of WatchdogReloader after clicking the install button for a plugin

Categories
Computer/server projects Hardware projects

Zero-fan, GTX 1060 powered Home Theater PC

The idea

We have always had a Home Theater PC (HTPC) in our living room. It was a makeshift computer, being made of old computer parts and a cheap SSD. It worked fine, however there were a few compromises we had to make while using it. The fans were very loud, startup times were slow (even though it had an SSD) and it lacked overall performance. It could be used to stream Netflix or live television, sure, and it could even handle games like rocket league on low settings. But it was still time for an upgrade!

We managed to get our hands on a decent gaming machine. It consists of a GTX 1060 graphics card and an Intel Core i5 processor. Triple A games on medium settings are no problem for this machine. So, two of the three problems are solved: it’s capable of playing games with decent quality and the boot time is a lot faster. It was time to tackle the third problem: the noise..

The execution

I’ve always been a fan of Parsec. It’s a piece of software that lets you stream your entire desktop seamlessly over the internet. It’s aimed mostly at the gaming scene, so you can connect to your powerful gaming tower from a low end device, but it works just fine for general purpose desktop streaming. It supports streaming over the internet, but it works even better when using it in your own (wired) LAN, which adds only one or two frames of latency.
After some digging online, it turns out you can run the Parsec client software on a Raspberry Pi 3! Can you see where I’m going with this?

Luckily I had an old Raspberry Pi laying around in my shed, however it was very rusty. I crossed my fingers and plugged it in to a 5v power supply and a monitor. It turns out a little rust on a Raspberry Pi isn’t enough to kill the little thing!
After reinstalling Raspbian (now known as Raspberry Pi OS) to the SD card and installing Parsec, the software worked flawlessly. Connecting to the host PC did not have any issues at all, and the Pi could handle resolutions of up to 1080p with 60fps without any issues. With both devices wired to our cat 6 equipped local network, there was virtually no input lag.

So the noise problem was tackled! After writing a few scripts to easily start up the Parsec client GUI and to connect to the host automagically, it feels like you’re using a windows machine running directly off of the Pi!
Another benefit of using a Pi is that it can run 24/7 without using any noticeable amount of power. Knowing this I have installed Raspotify: A Spotify Connect client for the Raspberry Pi that Just Works™. With this it’s possible to easily stream music to our 18 year old amplifier from any smartphone!

Power savings..

So, the solution is awesome right! Having a computer you can always connect to using a fanless Raspberry Pi? Well, not quite. The PC running Windows consumes about 60 watts when on idle. To solve this, I enabled Wake-on-LAN (WOL) on the Windows PC. With this enabled, sending a special crafted broadcast packet to our network will turn on the PC as if it’s magic. I installed a program called etherwake on the Pi, following this guide. With it I can start the PC remotely with a simple bash script. But you know me: this wasn’t enough.

The drawer the Pi is sitting in used to be the housing of the old Windows PC, and contained a make-shift power button. It’s basically a simple push button wired to the motherboard. The Pi has a lot of GPIO pins that can be used for LEDs and buttons, so this is exactly what I did. It was just as simple as wiring the button to the Pi and writing a quick and dirty Python script to execute a bash script when the button gets pressed.

Lastly I used Windows’ Task Scheduler tool to shutdown the PC every night at 3 AM if it wasn’t turned off already. This prevents accidentally leaving the computer on and still wasting a lot of power.